Home Assistant & Zigbee: How to Set It Up and Put It to Use, and Why You Should Do the Same! Part 1 - Zigbee Bridge
Zigbee is a wireless mesh networking protocol that is utilized in a variety of consumer and industrial applications. Mesh networks are formed by Zigbee devices, which means that a majority of mains-powered devices can operate as a repeater for other devices in the network. This makes Home Assistant the ideal candidate in my opinion, as it allows us to control our devices without relying on cloud services.

Today, I'll show you how to set up Zigbee in Home Assistant in this article. I will be discussing all things Zigbee. What is it you may be wondering, well it is a wireless mesh networking protocol that is utilized in a variety of consumer and industrial applications. Mesh networks are formed by Zigbee devices, which means that a majority of mains-powered devices can operate as a repeater for other devices in the network. As a result, Zigbee networks are extremely flexible and scalable.
Zigbee has gained popularity in the home automation industry in recent years because of its low power consumption, mesh networking capabilities, and interoperability with a variety of devices and platforms. Which makes Home Assistant the ideal candidate in my opinion, as it promotes local control and privacy and allows us to control our devices without relying on cloud services.
Due to the fact that we have three options, I believe it would be unjust to attempt to include them all in this one post, so I have decided to separate them into three posts. This is the first of the posts detailing the conversion of a Zigbee Bridge to ZHA.
Requirements
Aside from Home Assistant, a Zigbee device, and the Zigbee Bridge, we are going to need a few things to get this done;
- FTDI Serial-to-USB Converter 3.3V capable
- Soldering Iron - A TS80P model is my recommendation, it is small, compact and portable, but you can always get it done with a cheaper soldering iron.
- DuPont cables or Breadboard wire (as an FYI, I will be using DuPont cables)
- Tasmota binary for Zigbee Bridge - latest tasmota-zbbridge.bin release-12.2
- Zigbee Firmware for the Zigbee Bridge - latest ncp-uart-nsw_6.7.9_115200.ota
Good to Know - Framework
The website BlakAdder has supplied us with a terrific resource called the Zigbee Device Compatibility Repository, which includes everything you think you need and more, and to which I have included a link to below. But first, let's go over some fundamental vocabulary so that we're all on the same page.
The three basic components of Zigbee devices are end devices, routers, and coordinators, however these components can perform many roles. A coordinator, which can also route data to end devices and other routers, is the first device necessary to set up a Zigbee mesh network. The next device is a router, which may provide end device information, route traffic, and help in mesh network extension. The final component is an end device, which cannot route traffic and can only provide its own data and the overall number of Zigbee devices on your network depends on the coordinator hardware and firmware as well as the number of routers you have.
Coordinator
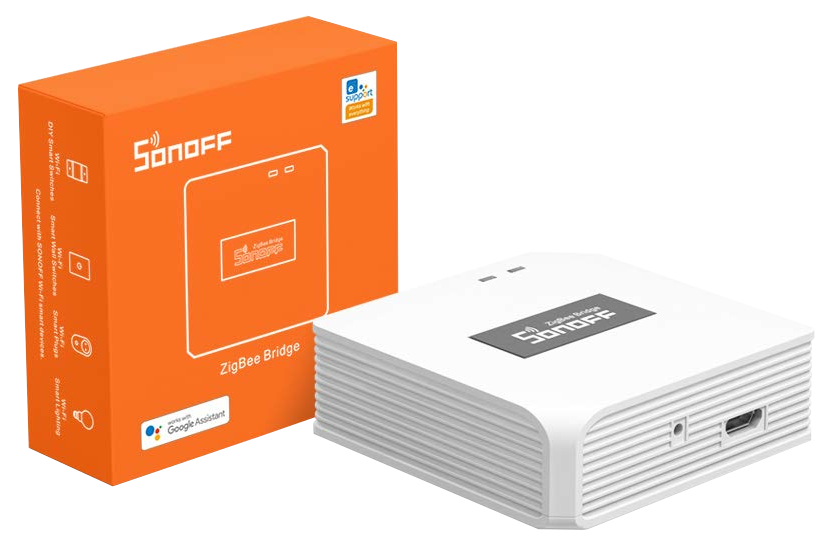
This post focuses on the Zigbee Bridge, which we will be setting up as a coordinator and it is responsible for administering the Zigbee network and ensuring that all devices can communicate with one another. Coordinators also play a significant role in network security since they are responsible for delivering security keys to the other network devices.
I have previously tested the CC2531 Zigbee USB Wireless Module and this Zigbee Bridge. In the other posts in this series, I discuss the Zigbee Bridge Pro and the Sonoff Zigbee 3.0 Dongle Plus.
I should mention that the CC2531 is no longer widely supported or even maintained because it does not perform well with the new Zigbee 3.0 devices and can only communicate with a small number of devices, so I will not covering that device.
Flashing
We will begin with flashing, followed by integrating and pairing in Home Assistant. One quick note here before we begin. In contrast to the Zigbee 3.0 Dongle Plus, which must be hooked into your Raspberry Pi or PC, these bridges can be installed anywhere in your home, independently of how you're operating your Home Assistant instance. Finally, let's begin;
We will use the FTDI Serial-to-USB converter and the Tasmota Web Installer to flash the Tasmota binary to the device. This first step will, as they say, Tasmotize our device, which just basically means that we are changing the “software” under the hood to Tasmota, instead of what comes on the device. If you are using the Web Installer, it will auto detect your device and apply the correct binary, otherwise if you are using another tool, you will have to head over to Tasmota’s GitHub page and download the latest firmware for the ZB Bridge - at the time of writing this it was tasmota-zbbridge.bin release-12.2
As always, there are other ways to perform this flashing; I'm merely demonstrating a straightforward method that does not require installing anything.
***WARNING / DISCLAIMER***
By following my guide, I offer no express or implied warranty of any sort. I will also not be held liable for any product defects or damages to you or your equipment resulting from the use of this guide.
You could be severely injured or be killed if you flash a device plugged into mains-level voltage; if you don't know what you're doing, stop and seek assistance from someone who does.
You've been warned.
We are going to need to take this device apart by removing the 4 rubber feet to access the screws and pull the board out gently from the opposite side as the USB and power. Now take the PCB out and connect either breadboard wires or DuPont cables to the following pins;
The Bridge must be in programming mode before the Tasmota firmware can be flashed (uploaded). This is accomplished by connecting the GPIO0 pin to GND while the device is booting, as detailed in the connections you see. It is acceptable to leave the ground connected while we complete this flash, but we will need to disconnect it before rebooting the device.
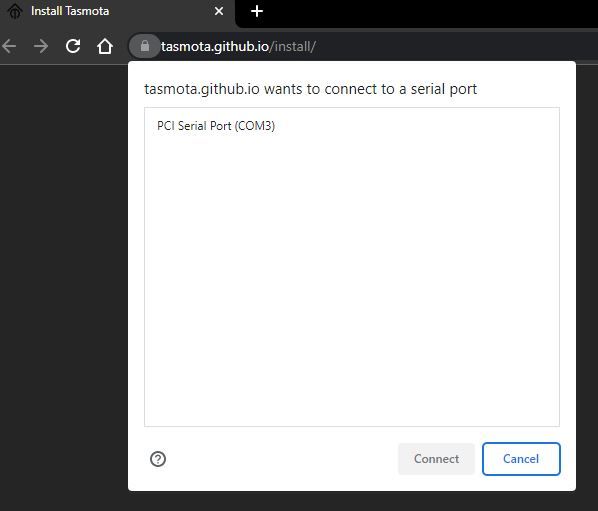
Once you have all your wires hooked up as you see in the above table, we can plug the FTDI device into our USB extension cable and then into the computer and load up the Tasmota Web Installer. Then we can select “Tasmota Zbbridge” from the drop down menu, leaving it set to “ALL” and select connect.
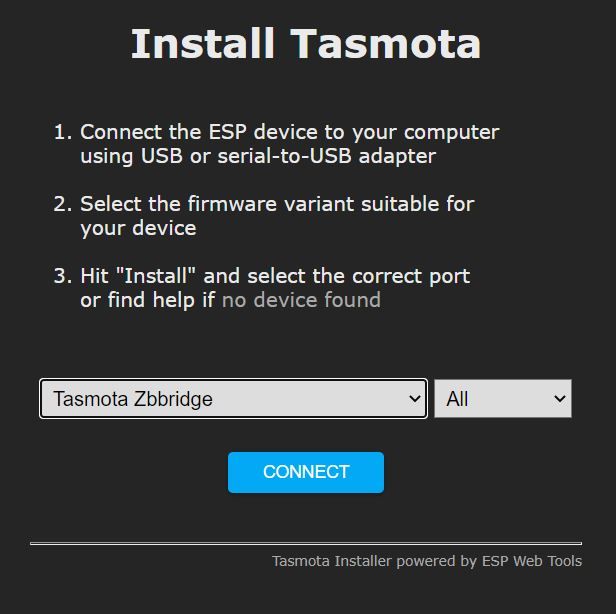
It will then open another window where you can select your device from the list and again select connect. If you do not see your device or you get an error.
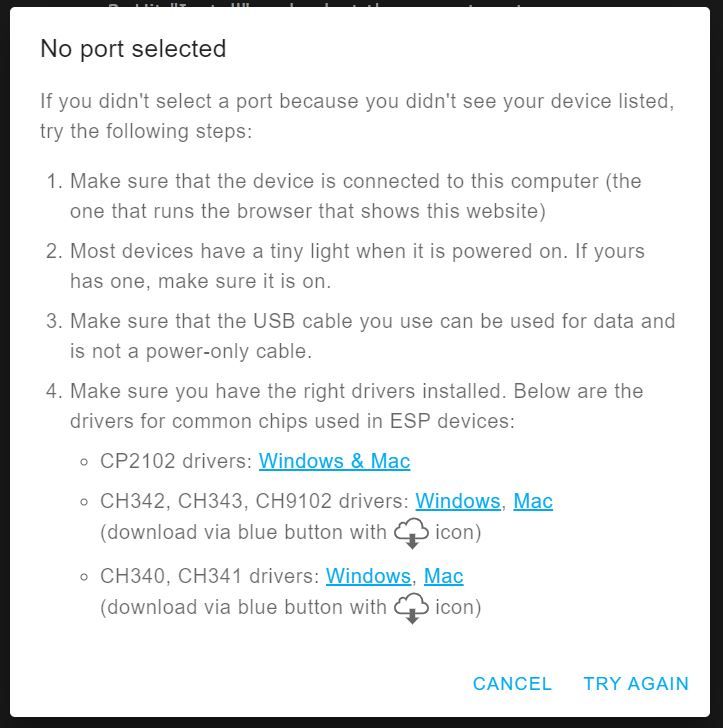
You may not have the proper drivers installed, which are linked in the new pop-up window, or your device is not working.
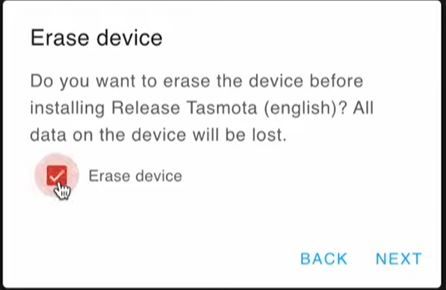
Once you do connect to your device you will be able to select the ”Install Release Tasmota” option and the next window that pops up is asking us to erase the device first, select the erase option and then click next.

In this window again it is going to confirm that we want to complete this install and erase our data, click the install button.

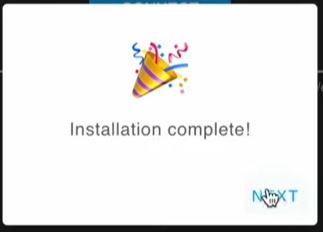
Let the installer do its thing, don’t close the window and be careful you don’t disconnect your device during this time as you may damage it. This will take a few minutes. When it is complete you will see a success message. Just click next.
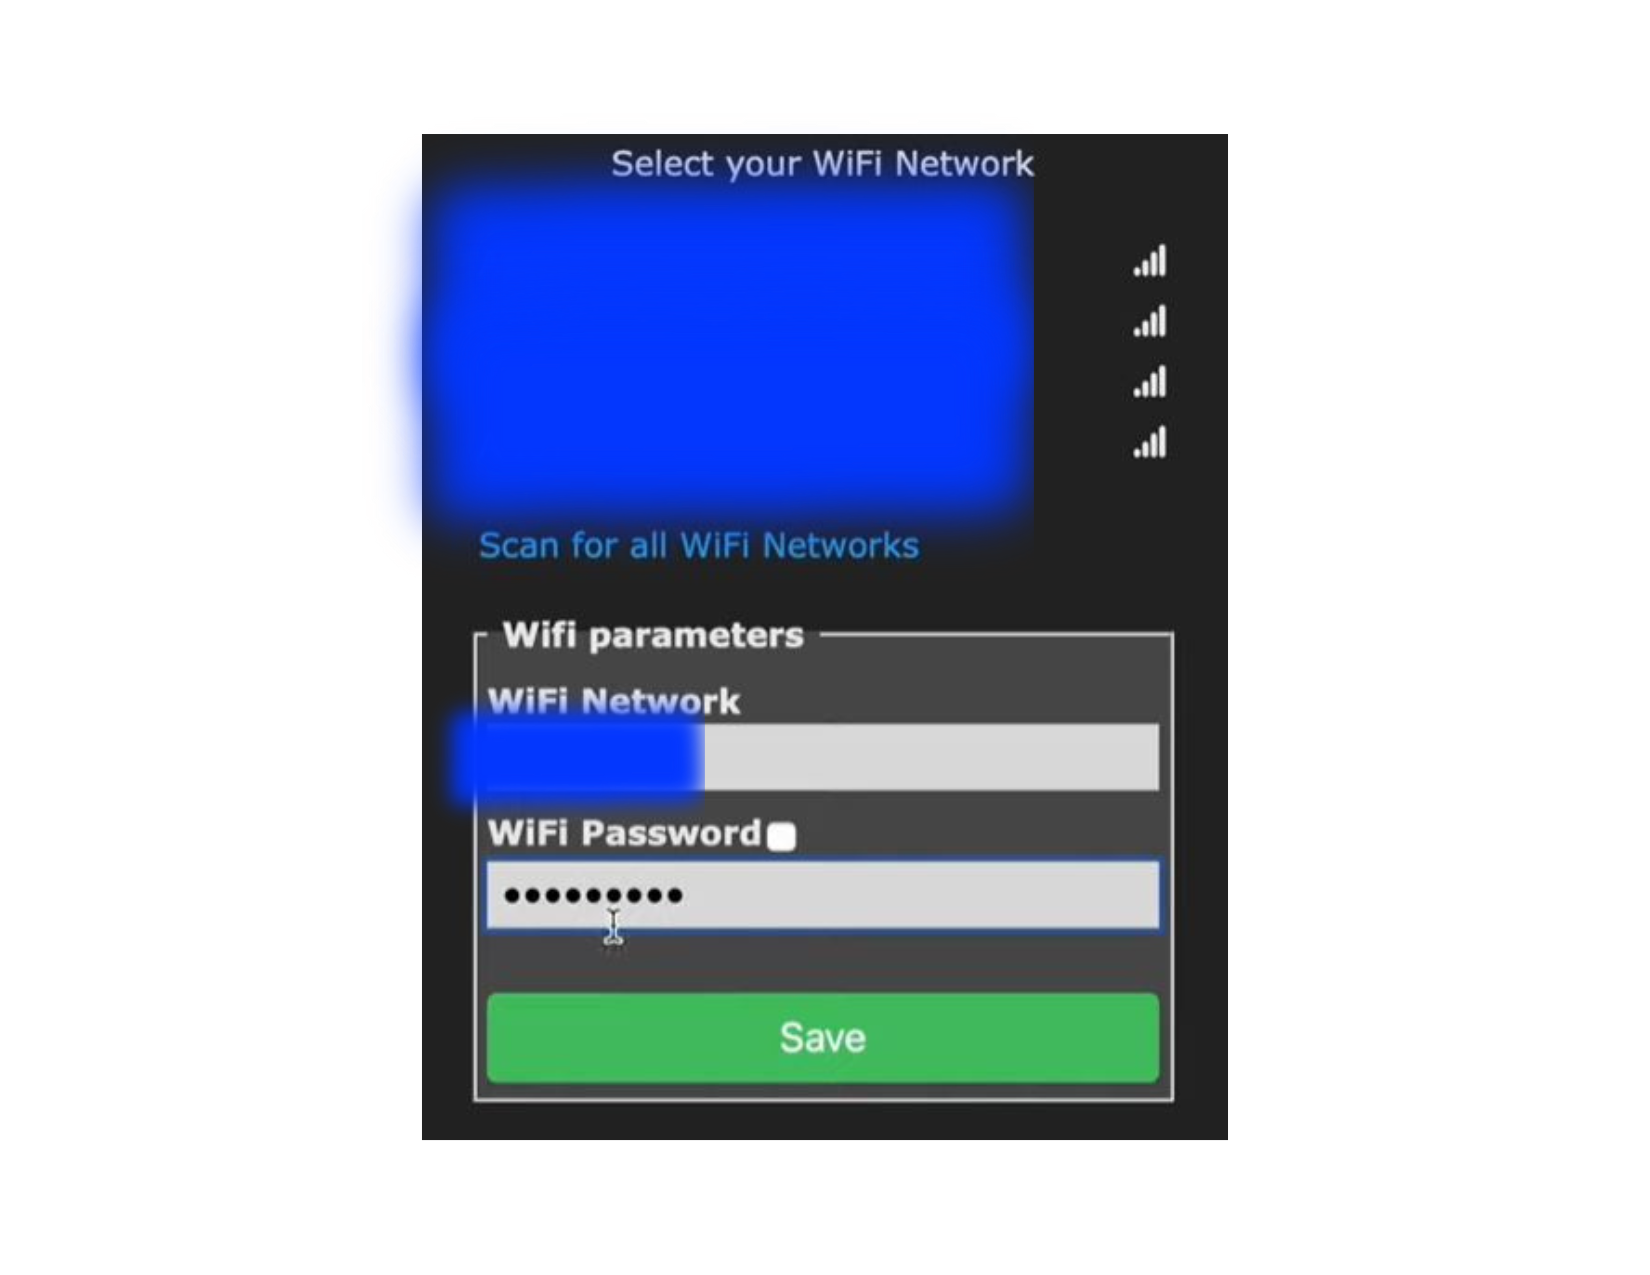
Now that it has been flashed, we must unhook it from the USB to shut it down and then disconnect it from the FTDI. Before desoldering, we may now verify that the device is operational, just in case we need to reflash it. Plug a USB cable into the bridge in order to power it up. We should see a new WiFi access point that, when we connect to it, will provide us with access to a captive portal where we can enter our WiFi credentials. The default IP address is 192.168.4.1. You should see your WiFi access list here, just select the network and enter your information and click save.
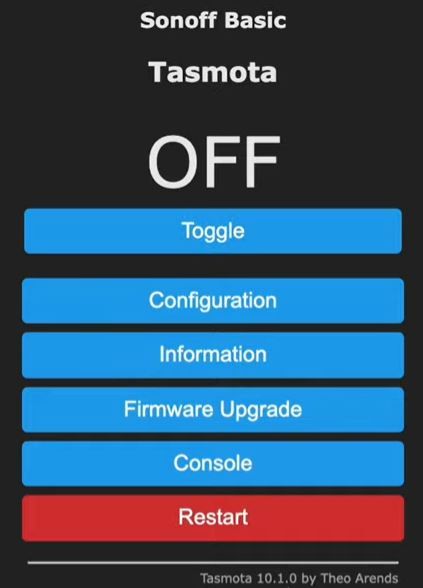
After successfully connecting to your WiFi, you should be redirected to a new page, or it will display the new IP address that was assigned to it from your router, but depending on how you connected to the initial captive portal, you may have to reconnect to your WiFi and then navigate to the new IP address, where you will be see the new captive portal and menu options like this;
Once you see this, at this point, you have the option to power down and desolder now or wait until the next stages have been performed. I will desolder everything, reinstall it in its case, and switch it back on. We will now upgrade the firmware with the most recent Zigbee firmware, which was ncp-uart-nsw_6.7.9_115200.ota at the time of writing this.
Click on “Firmware Upgrade” and then scroll down to "upgrade by file upload," select the Zigbee firmware we downloaded, and then click "start upgrade." After it finishes, the now Tasmotized device will reboot. If you go into the console, you should see Zigbee2Tasmota start up in the console.
At this stage, you have two options: Zigbee2Tasmota or Zigbee Home Automation for Home Assistant. I'm going with the latter. To use this option, we must change the mode of the ZBBridge to TCPBridge. To do this, we will go to "Consoles → Console" and paste the following code;
backlog rule1 on system#boot do TCPStart 8888 endon ; rule1 1 ; template {"NAME":"Sonoff ZbBridge","GPIO":[56,208,0,209,59,58,0,0,0,0,0,0,17],"FLAG":0,"BASE":18} ; module 0 Press enter and lastly restart the device!
Integrating into Home Assistant
We can now navigate to our Home Assistant instance and start integrating our new toy. To do so, navigate to Settings → Devices & Services and then click the Add Integration icon in the bottom left corner. We will search for ZHA and click on it

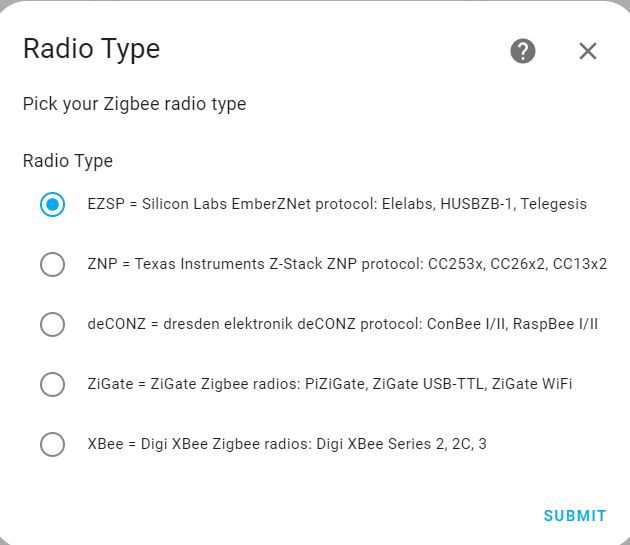
then in the next box, select "Enter Manually" for serial port and "EZSP" from the selection for radio type
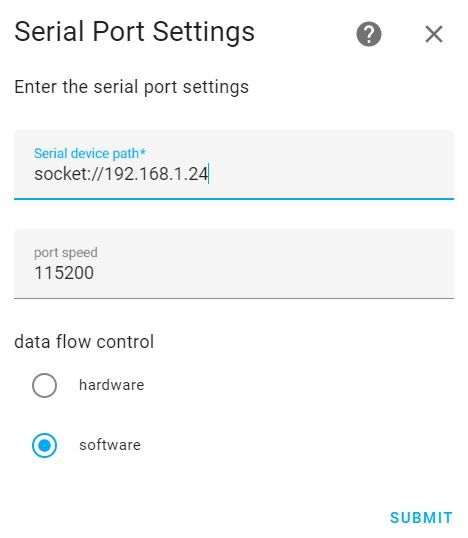
In the Serial device path, type socket://[ZBBridge]:8888. Substituting [ZBBridge] with its actual IP address, changing the port of 8888 if you changed it when we flashed this device, and finally setting the port speed to "115200" and leaving the data flow control on software and then clicking submit. You should receive a notification confirming that Home Assistant successfully added the new device.
Pairing Devices
You can use the zha.permit service on the ZHA domain to add additional devices. Click the Service icon in Developer tools and then select zha.permit from the Service drop-down menu. Follow the device's instructions for adding, scanning, or resetting to factory settings. Alternatively, you can navigate to the ZHA integration and select configure, then click the plus button in the bottom-right corner and put your devices into pairing mode according to their instructions.
You can also pair devices with the add device from the newly installed coordinator.
Binary Tech Labs
YouTube content creator that provides tech tutorials and reviews on Home Assistant, IoT devices, Raspberry Pi and other Single Board Computers